Take a closer look at the Flexweld Cobot Welding System in this detailed walkthrough. Learn about the main components, why we choose them, and how they work together to deliver superior performance. This video also highlights the differences between manual and robotic welding equipment, with a focus on the Kemppi and Fronius welders.
What is the Flexweld Cobot Welding System
The Flexweld cobot is a lightweight, compact automated welding system designed to meet diverse production demands. This intuitive system offers simple usability, safety, and efficiency in tight or demanding industrial environments. Whether you’re scaling your capabilities or adapting to changing needs, the Flexweld cobot is engineered to tackle low-volume or high-mix welding operations long-term, even in the most extreme shop conditions.
Key Features of a Flexweld Cobot Welding System
Flexweld systems are made up of multiple components that work together to create an efficient and intuitive system. The main parts of a flexweld system include:
- The Cobot: This is the robotic arm. The FlexWeld cobot is easy to program and use by simply moving them where you want them to go.
- Robotic Welding Torch: They are similar to manual welding torches, featuring the same type of front end consumables such as gas nozzles, contact tips, and diffusers. Water cooled torches are recommended for welding robots to ensure the longevity of consumables.
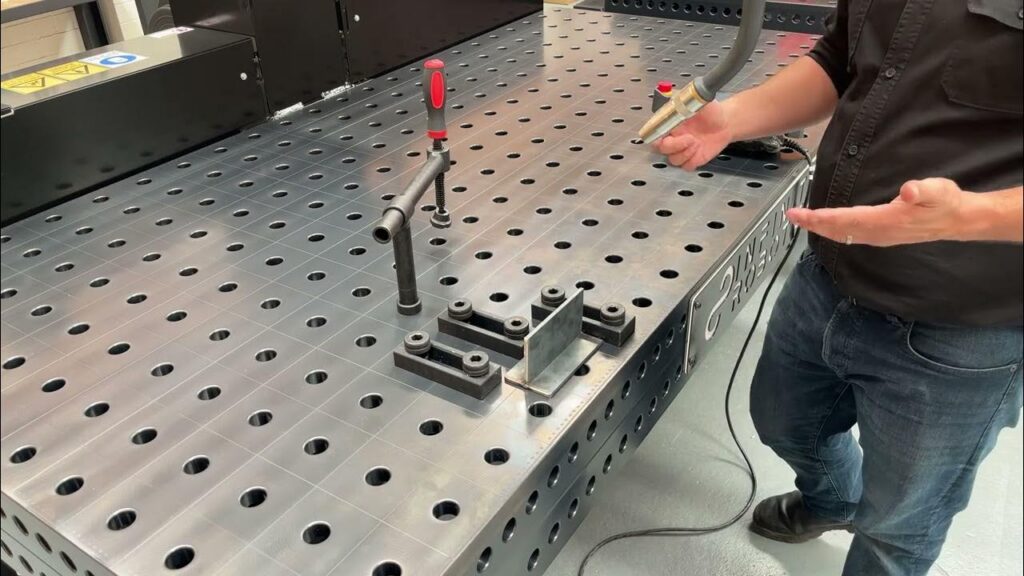
- Fixture or Jig Table: This is where you mount your parts to. You can provide your own or we can provide one as part of a turnkey setup.
- Welding Power Source: This is responsible for powering your welding setup. We recommend either Kemppi or Fronius power sources to ensure reliable power and weld quality.
- Robotic Wire Feeder: These are similar to manual wire feeders, with four drive roll systems and tension knobs which can be changed depending on your chosen wire.
Flexweld Cobot Welding System Walkthrough
Transcript:
The first thing you’re going to need is the cobot itself. Unlike a traditional industrial robot, cobots are very easy to learn how to program and use. You can just grab them and move them to where you need them to go. This makes it very simple and intuitive for welders to learn how to program. In fact, most people can pick it up in less than a day. But the best thing is we provide all the hands-on support and training for them so that they’re ready to run from day one.
The next thing you’re going to need is a robotic welding torch. The robotic welding torch is this thing here. It’s very similar to your manual welding torch. Has the same type of front end consumables like your gas nozzle, your contact tip, and diffuser. We like to use water cooled torches for our robots because we find generally that robots are welding for much longer and typically at much higher amperages. So having them water cooled helps your torch and your consumables last a bit longer.
The next thing you’re going to need is your fixture or jig table to mount your parts to. We like to use these types of jig tables for cobot systems because you can create jigs very simply and easily using off-the-shelf clamps like the ones you see here. You can either get a complete turnkey system from us like the one shown here or you can supply your own welding bench.
The next thing you’re going to need is a robotic welding power source. So we’ll jump around the back and take a look at a couple that we have here. Okay, so we’ve jumped around the back to look at the welding power source. And this is one of the welding power sources that we use, it’s a Kemppi. We also use Fronius. The reason we choose Kemppi and Fronius is because we want something that’s going to be reliable and is going to give you a great weld every day. And that’s what Kemppi and Fronius are. They’re the two best welding power sources in the world.
On this one, we see a Kemppi. This is the Kemppi AX. This is a 500 amp power source with a water cooler and it’s built off the Kemppi X5 Fast MIG U with the AX module on top that allows it to communicate with the robot. As you can see, unlike your manual welding systems, there’s no display on the front and there’s no wire feeder with a display. That’s because on the AX, all of your welding parameters are set on the Kemppi app. You can do that on your phone or through the Tablet Teach Pendant.
Other than the power source itself, you have the Kemppi robotic wire feeder. The robotic wire feeder is not too dissimilar from your manual wire feeders. It’s still got the four drive roll system with the tension knobs and you just change the drive rolls and the liner depending on the type of wire that you’re using. And then depending on your layout, you could either have your 15 kilo spool holder or a 250 kilo drum.
Up next, we’ll go and have a look at one of our Fronius systems. So you can see the difference between the two. Okay, we’ve jumped over to one of the other systems that we’re building in our shop at the moment that’s got a Fronius power source on it. This is a Fronius TPSI 500. It’s also a 500 amp water cooled system and it also looks very similar to your manual Fronius welding systems. On this one, you set all of your welding parameters and welding schedules on the front display as job numbers just as you normally would with your manual welding.
The wire feeder looks almost the same as your manual wire feeder. You’ve got your drive rolls in here. And of course, you just change your drive rolls and liners depending on the type of wire that you’re using.
Okay, so that’s everything that you’ll need to get started with one of our collaborative welding systems. If you’d like more information or you’d like to organise a demo, please let us know. We’re always happy to help. Hope you have a great day. Thanks for watching and happy welding.
Are you ready to improve your operations?
If you want to take your welding to the next level, contact Infinite Robotics today. We can help you solve your challenges, reach your goals, and get the most out of your business.