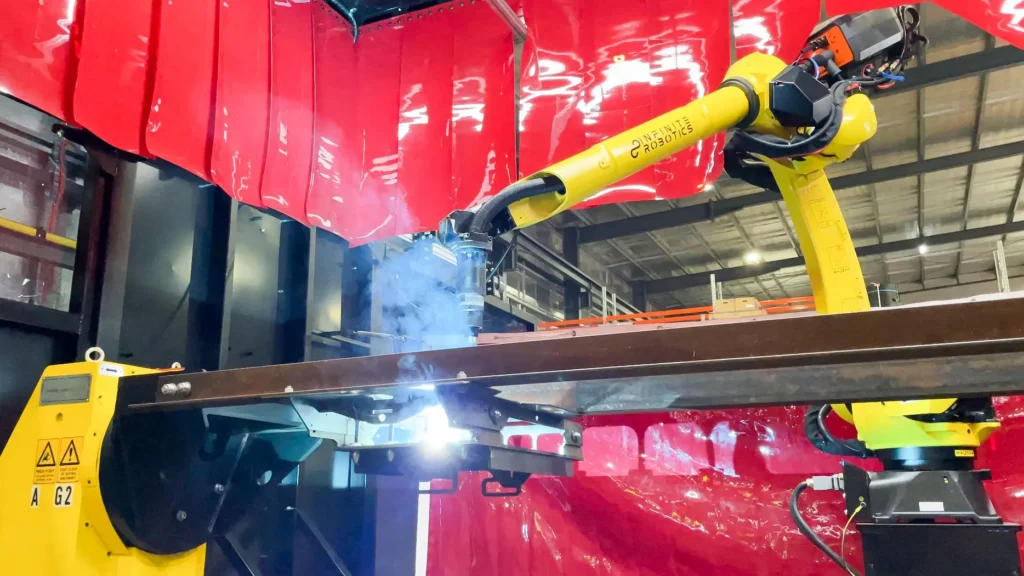
Discover how easy it is to program a weld on the Flexweld Cobot Welding System. This video demonstrates the intuitive drag-and-drop programming process and manually guided teaching, making it approachable for welders of all skill levels. Learn how to create a fillet weld program with precision and ease.
Transcript:
Hi, I’m Mitch from Infinite Robotics and in today’s video, we’re going to go through creating a program on our Cobot welding systems.
To create a program on a Cobot welding system, it’s a combination of using the Tablet Teach
Pendant from Fanuc, which is based off a Samsung Galaxy. So, the type of gestures and navigating menus is quite familiar to your operators because it’s based off their phones that they’re using every day.
And then we generally just need to move the robot where we need it to and record the position on the Tablet Teach Pendant. The great thing about cobots as well is you can move them around with your hand. So they’re very tactile. And then also there’s really no programming on the Tablet Teach Pendant. It’s very graphical. It’s just a case of dragging the icon onto the screen that corresponds with what you need to do with the robot, such as recording an air move or a welding command.
So the first thing we need to do is create a new program on our Tablet Teach Pendant. So we go up here and press the menu icon and then press select menu and it will bring up a list of programs that’s on the robot. It will automatically save programs on the robot that you can reuse later. So that’s great, so then if you already have the program created, you simply just need to load your part and jigs onto the fixture table, call up the program, and run it.
So, we’re going to make a new program here by pressing ‘New’. And you give it a name to describe what the part is. In this case, I’ll give it something really original and creative such as ‘Test Weld’. And then we’ll go ‘Create’. And we can see it’s created a brand new program on our screen.
Up the top here, we have what they call the timeline. This is where you drag your icons onto to record. But the first thing you need to do when creating a program for welding is to drag on the ‘arc teaching’ tool. This will allow us to create programs really quickly and easily using the shortcut buttons on the wrist of the robot. And as part of the setup, there’s templates and in the template you can automatically preset that every time you record a welding position, it uses your required welding procedure.
In this case, every time that I record a welding start or a welding end position, it’s going to use welding procedure one, which is a 3 mm fillet on a 5000 series aluminium in a downhand position. But you can see here we’ve also got one preset for vertical down.
On a robotic welder, just like your manual welders, you can save multiple jobs or channels depending on if you’re using Fronius or Kemppi. And then that allows you to recall them by the robot to weld any type of part that you’re using on the robot. So, now that we’ve loaded in our ‘arc teaching’ icon, we can put down the teach pendant and begin programming.
Very importantly when you’re creating a program for robotic welding is to ensure you set your stick out correctly. So we’re going to set our stick out to 10 mil using our tool here. So, we’re going to cut the wire off, making sure that the wire is not bent because wherever you’re pointing the wire is where the robot’s going to go. So, if you program with bent wire, then the robot is not going to be taught in the correct position. And the next time you go to run that program, the robot will not be welding in the joint.
So, the first thing we need to do is record our safe approach point. This is the point where the robot’s going to begin the program and you don’t want it starting down near your fixtures or your jigs. It needs to be in a safe position up here. So, to record a position, we just press the button on the wrist and you can see that it saved our air move command there by the squiggly line. So, next thing we’re going to do is move our robot down to another approach point somewhere closer to the part. And then we press the button on the wrist again to save the next approach point. So in our program, we’ve got two air moves. The first air move was up here and the second one down here. So that means when we run the program, the robot’s going to start up here and then come down to this next position here.
So from here, we’ve got a clear accessible non-collision path to the welding start. So we’re going to come down straight to the welding start now. Making sure that you get your wire in the joint and you’ve got your correct welding torch angles. And once the robot’s in that position, we press and hold the button and then let it go and it will automatically put in our welding start command and call up the appropriate welding procedure.
In this case, we’re programming a straight line, so we just need the welding start and welding end. But with a robot, you can also weld pretty much any type of shape such as circles and curves or multiple straight lines. It’s just a case of joining what I’m showing you here into a much larger program. So, it’s simply just repeating what we’ve done here multiple times.
So, the next thing we’re going to do is move the robot over to our weld end position down here. That’s not a really great torch angle, so I’ll fix that up. And when you’re happy with that, you press and hold the button again and we’ll put in your welding end command. So from the welding end, just like the welding start, we need to make sure that when we go to our next point, we’re not going to run through the jigs or the parts. So you need to come out to a safe position, about here, press and hold the button and that inserts another air point for us. And then we can move the robot back up here ready to go to its next weld. Press the button to record the position.
So once we’ve finished creating all the points in our program, we press the tick button to say that we’ve finished teaching and then we’ve got our program here. So, if I click on the ‘welding start’ icon, we can see here it’s using welding procedure one for 3M fillet downhand just as we expected from the template. And we’ll just go ahead and check the welding end. Yep, it’s the same. Now we’re pretty happy with that program. We’ll run it through and check it.
So, generally when you’re starting off with robotic welding, we say not to just hit play and go. You want to check your program to make sure that it’s collision-free and you’ve got the right welding torch angles and that the wire is in the joint. So, we run it in what we call step mode. So, I’m going to enable step mode. So, this will step the robot through one icon at a time. So, I press the ‘forward’ button. The robot will pause and wait for me to press ‘forward’ again. Then it will go down to the next icon which was our approach point. And then I press ‘forward again and the robot will go to another approach point. And then we’ve got our welding start point. Looks good. Then we’ll move across to our welding end position. Watching the welding wire to make sure that it’s in the joint the entire time and that we’ve got the right torch angles. It’s at the welding end. Looks good. Then we come out to our retreat positions or retract positions and then we come back up to that safe point. So that looks pretty good.
Now we can run it in continuous playback as a dry run just to make sure that it looks okay as a continuous run. So to do that we turn off the Teach Pendant and we’ll get the ‘play’ icon down the bottom. We simply just press ‘play’. The program will jump back to the start and we press ‘play’ again and it will begin going. And we watch it and it looks good to me. So the next thing you would do once it’s finished is you turn the arc on and you weld it.
So, it’s fairly straightforward to create a program on one of our cobots. As you can see, most welders and operators can pick it up in less than a day. And the great thing is we provide all kinds of hands-on support and training with every robot system so that your operators are ready to run from day one.
If you’d like any more information or you’d like to see a demo in-person, let us know. Always happy to help. Thanks for watching. Hope you have a great day and happy welding.
Key Features of the Flexweld Programming System
Cobot programs are designed to be simple to use, allowing operators to get results from day one, offering simple programming features, such as:
- Tablet Teach Pendant: Based on a Samsung Galaxy user experience, the gestures and menu navigation are designed to be familiar to anyone who uses a smartphone.
- Icon-Based Programming: Simple programming allows you to simply drag and drop icons onto the timeline for air moves, weld start, weld end and more.
- Hand-Guided Teaching: Move the cobot by hand to the position you need, then record it.
- Wrist-Mounted Shortcut Buttons: Record positions and weld commands at the point of work, without going back to the tablet after every move.
- Preset Welding Procedures: Templates apply your required welding procedure automatically each time a weld start or end is recorded.
- Saved Weld Jobs and Channels: Store multiple welding jobs (Fronius) or channels (Kemppi) and have the robot recall them for different parts, joint types and positions.
- On-Robot Program Storage: Programs save automatically on the robot. For repeat jobs, load the part and jigs onto the fixture table, call up the program and run it.
- Step Mode and Dry Run: Check every program one icon or step at a time, then as a continuous dry run, before a single weld is completed to confirm accuracy and prevent costly collisions or errors.
Programming a Weld on the Flexweld Cobot: Step-by-Step
Cobot welding is easy to pick up because there’s no code to write. Programs are built on the FANUC Tablet Teach Pendant by simply dragging and dropping icons onto a timeline, and the operator physically guides the robot to each position and records it with a button press at the wrist.
The video above walks through a complete fillet weld program on the FlexWeld. Here’s the process in a quick-reference format.
1. Create a new program
- Open the menu on the Tablet Teach Pendant and select the program list
- Press New and name the program after the part
- Press Create to open a blank program and timeline
2. Load the arc teaching tool
- Drag the arc teaching icon onto the timeline first
- This enables the shortcut buttons on the robot’s wrist for fast teaching
- Templates can preset the welding procedure used every time a weld start or end is recorded
3. Set your wire stick-out
- Cut the wire to length using the stick-out tool
- Make sure the wire is straight, because the robot goes wherever the wire points
4. Record a safe approach point
- Hand-guide the robot to a safe position well clear of fixtures and jigs
- Press the wrist button to save it as an air move
5. Record a second approach point
- Move the robot closer to the part, with a clear, collision-free path to the weld start
- Press the wrist button again to save it
6. Record the weld start
- Position the wire in the joint at the correct torch angle
- Press and hold the wrist button, then release
- The weld start command is inserted and the preset welding procedure is called up automatically
- Record the weld end
- Move to the end of the joint and correct the torch angle if needed
- Press and hold the wrist button to insert the weld end command
- Retract to a safe position
- Move clear of the jigs and part and press the wrist button to record a retract point
- Return the robot to a safe point, ready for the next weld
- Finish teaching
- Press the tick button on the pendant
- Check that the weld start and end icons show the correct welding procedure
- Check the program in step mode
- Step through one icon at a time, confirming the path is collision-free
- Watch that the wire stays in the joint and the torch angles are right
- Dry run in continuous playback
- Run the full program without the arc on to confirm it flows as a continuous cycle
- Weld
- Turn the arc on and run the program
Benefits of Simple Cobot Welding Programming
Faster to Learn
Based on familiar Samsung Galaxy interfaces, most welders and operators can pick up programming quickly, delivering fast results with no specialist knowledge required.
Welders Retain Control
Manual guided teaching and positioning allows skilled welders to maintain control over the processes and can program welds based on their existing knowledge and experience.
Quicker Changeovers
Saved programs and stored welding procedures streamline processes for repeat parts. This is ideal for boosting efficiency across high-mix, low-volume production.
Safer Programming
Step mode and dry runs allow operators to catch potential collisions and torch angle problems before they cause costly damage or rework.
User-Friendly Programming
Simple drag and drop programming allows your team to add and modify programs in-house without needing to call a specialist.
Day-One Productivity
Every FlexWeld cobot system comes with comprehensive hands-on training, so operators are ready to run from day one.